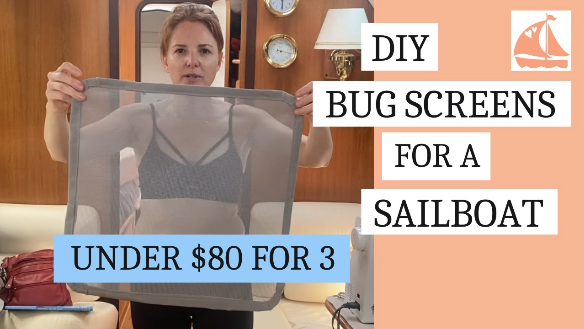
How to Make Bug Screens for your Sailboat

Mosquitos like me. A lot!
I have been waking up with bites all over my body, and it has to stop.
One of the reason is because we don't have screens on a few of our hatches. When we bought the boat, the two hatches in our bedroom didn’t have screens on them. To order them new would be about $150 each.
Why pay that when I can make them myself for under $80!
Without bug screens, we have to close all the hatches on our sailboat and the companionway door at night to keep the bugs out, but that also keeps the breeze out too. Which makes it really hot in the boat at night, and hard to sleep.
So when I saw that Island Waterway Provision Store in Oriental, NC had Sunbrella and Phifertex, it was time for me to get busy and make those bug screens.
I went back to the boat and measured all the hatches and companionway opening, drew out a sketch of what the pattern would look like, and figured out how much fabric I would need. I also needed velcro- sew on and stick on. Stick on to put onto the boat, and sew-on to sew onto the actual screens.
We purchased 2 yards of the Phifertex, 1 yard of Sunbrella, and 14 feet of sew-on velcro, and went back to the boat to start the project.
Watch the video here to watch each step.
Here are the steps:
:47 ~ Supplies needed
1:06 ~ Measure and make a pattern
2:14 ~ Cut a large panel for the companionway out of Phifertex, then cut out smaller screens for the hatches. Make sure they fit in the places they are meant for before moving forward.
3:06 ~ Cut out 3" strips of Sunbrella. This will be for a 1" edging around all of the screens. You need 1" for the front side, 1" for the back side, and 1/2" for the seam allowance for both front and back = 3"
4:08 ~ Sew the edging around the screen with a 1/2" seam allowance on the Sunbrella and 1" on the screen. This will make the edging stronger for the velcro as the screen will go all the way to the edge of the edging.
4:40 ~ Press the Sunbrella fabric around the screen edge and turn under 1/2" on the other side. You can pin this, but I didn't. Stitch that edging down on the backside.
~ Check to make sure they fit again in the areas before continuing.
~ Make a casing at one end on the companionway piece for the plastic tubing to go in to keep the screen down. I used the 3" strip for this and kept both ends open for the plastic tubing to slide through.
4:53 ~ Sew one side of the velcro to the other end. I used the male side (the one that scratches when you touch it ~ the soft side will stick onto the boat so when the screen isn't attached it doesn't hurt to touch when closing the companionway door.
4:57 ~ Cut the plastic tubing a half-inch shorter than the width of the front door
~ Attach stick-on velcro to the boat door
5:06 ~ attach the velcro on the screen to the velcro on the door and lay the screen into place
HATCHES
5:56 ~ Repeat above steps ~ stitch 3" strips around edges, putting pleats into the curved corners. You can lay this out and pin it in place before stitching. 3-4 pleats seemed to work better than 2 pleats.
10:09 ~ Press the Sunbrella fabric around the edge of the screen and stitch down w/ a 1/2" seam allowance.
10:30 ~ Check to make sure they fit into the hatch before moving on.
10:49 ~ Sew the velcro on ~ the itchy side
~ Attach the stick-on velcro -the fuzzy side ~ inside the boat hatch.
~ Press the screen into the inside of the hatch, matching up the velcro on the screens and the hatch.
The links below are Amazon Affiliate links. If you purchase after clicking, we may make a small commission at no extra cost to you. Thank you.
TOTAL COST: $77.86 USD plus tax, and there's leftover fabric and screen to make more or for another project.
Sunbrella ~ $26.99 ~ https://amzn.to/3yCnS4m
Phifertex ~ $37.98 ~ https://amzn.to/3OIOTc1
Sew-on Velcro ~ $1.40 ~ https://amzn.to/3ab8MJR
Stick-on Velcro ~ $8.99 ~ https://amzn.to/3umgsQ0
Plastic tubing ~ $2.50 ~ https://amzn.to/3OYqajy
COST TO PURCHASE:
Between $100-160 for EACH hatch. The gangway screen would have needed to be custom-made.

© Myce, LLC 2022. All Rights Reserved.